Categories
Featured Article photograpy-articles Workflows

Travel Blog Workflow 3: Photography – processing & management

Pakistan man painting logos for a bus
A photography workflow on the road, is very different to a studio one

Photography and travel blogging go hand in hand these days. There are differences though.

I’ve read a lot about how pro’s handle their photography workflows in studio. Which is interesting. But I’ve never read about how people do it while on the road.

Here’s how I do it.

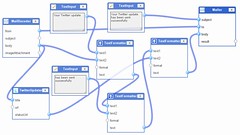
Brief overview of my photography workflow when traveling:

Some people include photo’s from 3rd party sources like Flickr. Others mix & match. Some upload directly to their blogging platform, others spend time in processing them.

All the photography on The Longest Way Home is taken by me. I host my photographs on zenfolio, and on site. I also keep multiple backups in cloud storage, and on hardrives.

I’ve documented the benefits of hosting photographs off site here in a comprehensive review of photo hosts.

Now here’s a look at this process from beginning to end.

How I “photograph” workflow:

I shoot with a DSLR in both raw and jpeg simultaneously. This creates two exact images.

The raw version can be thought of as being the negative version from an old film camera. It’s unprocessed, and quite large in size.

The jpeg version is the same image, but it’s been processed by the camera and compressed to a smaller size.

The benefit of a RAW file is that it contains a lot of information that the jpg does not. And, much like developing a negative in a dark room, a raw file needs to be processed in a similar way using software before it can be viewed properly.

A jpg can be used for viewing immediately.

I shoot with 16GB cards. I could shoot with 32GB or more. But the frank reality of travel photography when on the road 24/7 is that accidents happen. The camera could get stolen, the card may fail etc. 16GB is about right for me to not go overboard and never remove the before backing it up.

I also don’t erase the photographs from those cards until all back up workflows are finished. So yes, I have a few storage cards.

Let the photography workflow begin:

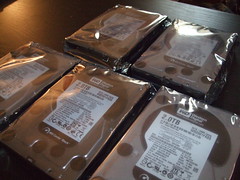
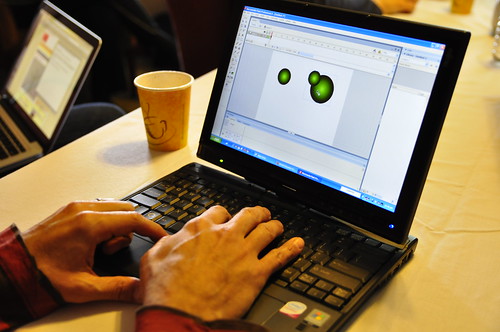
Once back in a hotel / guesthouse room I immediately transfer all the photographs from the day to my laptop and external hard drive (now there are 3 copies, memory card, laptop, HD.)

Once there I open an application to sort through and proof the days photographs. Many people use Adobe Lightroom, personally I do not.

We simply don’t have the same way of thinking, and I am not a fan of its processing capabilities.

I use my cameras own software, or ACDSee. For those not interested in processing and only in photo management of jpegs (batch renaming, resizing etc,) I would suggest Faststone. It’s free. Limited for pro photo usage, but for the very basics it gets the job done.

But for processing photos, converting RAW images, EXIF data, categorizing, batch processing and photo asset management: I would recommend you check out both ACDSee and Lightroom or Aperture for mac users (links to all of these application be found at the bottom of the page).

Selecting the Best Photographs:

made a few prints today
There is no luxury like this when traveling

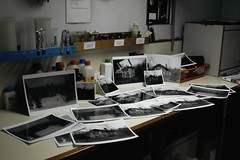
With everything open, I spend a lot of time deleting images that have not come out well. Maybe, they are out of focus, the subject is wrong, or they are just plain bad. They are deleted forever.

I use a full screen mode to view each image. Then, tag the good ones. Once I go through the first pass, I do a sort by tagged images. And, delete the rest.

I usually take a break there, a meal or something.

Then I make a final assault and repeat the first step over again.

Organizing Travel Photographs:

With the remaining photographs selected, I split them into different folders. The folders are named and dated by location.

Year – Location – Sub-location – sub-sub-location-(file name)

Each photograph is given some meta information now. This means I batch insert information such as copyright, keywords, categories and special notes into them.

I then batch rename my photographs so both the RAW and Jpeg counterparts both have the same name. it starts with alpha file name, and finishes with a number in order of date time. e.g. sofia-turkey-0021

Once there. I remove the raw files, and send them to another area on my external drive where they will remain untouched until they are backed up.

With the remaining jpgs, I begin to upload them straight from that main source folder.

Uploading photographs workflow

They get uploaded into one big folder on Zenfolio first. The reason I do this, is because internet capabilities get broken up when I travel. I might only be able to upload 300MB on a given night for example.

Yet, the shoot might mean I have 8+ folders of smaller batches to upload. It might seem better to upload everything in smaller batches in this case. But, think about it this way. It’s 10pm. I am tired and want to sleep, or relax. If I upload 50MB of food photos, it will take 2 hours.

Then at midnight I need to get up and upload the next batch from street photography of say 100MB. That should be finished at 3am or 4am …

See the problem? Whereas if I upload everything at once. I can go to bed at 10pm and hopefully everything is then uploaded by the morning and I can then separate them into different folders online, as well as offline. Which, is a lot faster.

Thankfully zenfolio allows one to have many, many sub categories (directories) which is very useful and fast to set up.

A note on cataloging photographs & an example:

Cataloging photographs, or inserting keywords in them is vital if you ever hope to locate a particular image in the future.

I was contacted by an advertiser who wanted an image on my site for a project. I simply could not find it. I knew what it was, where it should be, but could not find it. If I’d tagged it as “portraits” it would have been a lot easier to find.

It’s a simple thing to do, and it can save so much time in the future.

It doesn’t end here though it continues on in the second part of my Photography workflow while traveling.

Links mentioned above:

Zenfolio – photo hosting (use this code ” BDV-TGN-A7X ” for a $5 discount)

Lightroom ACDSee Faststone

In the next part of this workflow we will cover:

Avoid disaster –  Backing up photographs while traveling:

Final stages of the Travel blog photography workflow:

Additional processing workflows:

Meanwhile, what do you think? Do you do things differently, or can you suggest something to improve this workflow?

Categories
Interviews photograpy-articles

Interview with Food Photographer: Mei Teh from Cumi & Ciki

Fine Food Photography
Fine Food Photography by Ciki (aka Mei Teh)

Premier food blog Cumi dan Ciki is a sensory delight. Though focused on Malaysian cuisine, it rises above other food blogs by adding in a dash of humor, a sprig of travel news, a sprinkle of movie reviews and scoops of great food photography.

Run by Mei Teh and her husband Joe, we take a look at the sites main ingredient – great food photography and how it’s all done …

Meh Teh
Meh Teh from Cumidanciki.com

FotoArk: How did your website start? Was it just a personal blog, or have you always been photographing and, writing about food?

Our blog started out a couple of years back as a means to journal our travels and related photos. However, because we enjoy eating so much (as do other Malaysians!) this blog soon took on the form of a food blog…

[learn_more caption=”Click here to learn more about where the name of Cumi & Ciki comes from …”]There is Cumi-Ciki but who is ‘Dan’? For non-Malaysian or Indonesian readers (our languages are similar but have vast differences too), ‘Dan’ is not an imaginary person but the English word ‘And’. It’s not spelt backwards but that’s how it ‘s translated in Malay language. Since we used it in our original Blogger site, we kept it the same here. Cumi & Ciki is a Malaysian food and travel blog, which also tells of our worldly adventures! The name is derived from a popular educational television puppet show for Malaysian children in the 70s and 80s. This is the tale of the two traveling, eating, thrill-seeking monkeys from Kuala Lumpur, the capital city of Peninsular Malaysia. Ultimately food and culture go hand in hand and we strive hard to convey this via our blog on a daily basis.[/learn_more]

FotoArk: Tell us how you set up a photo shoot? Do you talk to the restaurant before and make a private appointment. Or do you just show up and start ordering?

Well sometimes we just walk in, sometimes we get emails or a phone call, requesting we pay the restaurant a visit. How and what we write is entirely up to us. We receive no monetary compensation for the review nor are we obligated to write a positive review if the food turns out, not entirely up to expectations.

FotoArk: Have you ever had a problem with a restaurant owner not letting you shoot there, and how did you deal with this?

Gyuniku Tataki – seared beef with ponzu

No, not really. If they say, no shooting, we respect their wishes. These days, restaurants actually welcome food bloggers. Free publicity is great anyway, don’t you agree? (we do!)

FotoArk: Many food photographers photograph food on a plate when its cold. Using things like soap bubbles on bacon etc to make the food a lot more appetizing. Do you do the same, or do you shoot the food live as it is?

Never. We shoot it as it is. Otherwise it defeats the purpose of blogging and keeping it real. Ours is a blog, not a food magazine.. no air-brushing required nor allowed;)

FotoArk: All of your food photographs are well lit, and the lighting beautiful. But restaurants are often low in light. Can you tell us if you use any special lighting to capture your work?

Invest in a good lens and a good flash. It’s not rocket science… just straight up photography. Take a clear, crisp shot and you are home free. No point having fancy props or a huge-ass camera if you cannot just nail one clear shot, right? I used to take shots on a point and shoot and now, a better camera. One thing remains the same. The clearest shot is the shot that you will end up using on your blog and that will make people hungry for more!

FotoArk: What’s the biggest challenge in photographing, and writing about food, and how have you overcome it?

Everybody has off days. Sometimes even the most eloquent of us run out of words. I read somewhere, that if writing is your passion

Poached Lobster
Poached Lobster

and you want to be writing till a ripe old age, you need to read. Don’t ever stop reading. Read anything and everything you can get your hands on (not necessarily just about food). Read in the loo, on the bus, in the subway.. read! No input.. no output. Again, not rocket science;)

In photography, my biggest challenge is picking the best shot. Sometimes my head says the clearest shot is the best, but my heart says, the less clear shot but the one with a great composition, that makes me feel something, is the shot to pick. This is always a challenge for me. Maybe I should stop taking so many angles of a single shot, huh? LOL
FotoArk: You’ve become quite the internet and Malaysian celebrity due to your blog and work there. Would you ever consider moving into this full time?
Nope. I love my day job too much;)
FotoArk:What advice would you give to someone just starting out who has a passion for food photography? Equipment, how to go about it etc.
Mitosis. Start small and progress to greater things. That is the logical progression of the universe as we know it.

FotoArk: A pro camera is better than an entry level camera in the hands of an intermediate. Would you agree, or not?

I disagree. I am living proof 😛

FotoArk: What would you answer if a client asked you this: “What makes you different from any other photographer?” (eg, why should we hire you)

If you like what you see on my blog, by all means let’s have coffee and a chat!

Many thanks to Mei for joining us & letting us in on her great world of food photography!

Interested in hiring Mei for a restaurant review or photo shoot? Here’s some more information:

[author] [author_image timthumb=’on’]https://www.fotoark.com/wp-content/uploads/2010/11/Meh-Teh.jpg[/author_image] [author_info]

  • Do you currently sell your photographs: No
  • Do you currently offer stock photography: No
  • Would you be willing to sell your photographs to an agency? Yes
  • Would you accept a contract for photoshoot: Yes
  • Where are you available to photograph? Malaysia
  • How can someone contact you for work? cumidanciki at gmail.com or twitter @agentcikay
  • Where can we see a gallery of your work? Top posts from Cumi & Ciki

[/author_info] [/author]

All photographs in this article are sourced with permission and the copyright of www.cumidanciki.com

Categories
photograpy-articles Workflows

Travel Blog Workflow 5: Writing & Revisions

It can take a lot of work putting together a travel blog post

The photographs are uploading, now it’s time to double up and get writing.[learn_more]Take a look at my previous article on backing up and uploading photos when traveling! Travel Blog Workflow 4: Photography – backing up[/learn_more]

How is a travel blog post written? My workflow

Whether the blog post is led by a photograph or something I want to document there’s a lot more work involved than many people realize.

Where to start writing a travel blog post?

Sometimes I’ll already have a rough draft done up. Other times, I start from scratch.

I’ll nearly always start out with a title. To me, the title is the idea or the starting point of what I want to convey or document into my journals. By the end of the draft, I usually end up changing the title.

From there I get writing. I don’t spell check, I don’t insert photos, I just write.

My biggest problem is that I don’t stop. So many journal entries go way beyond the “standard” blogging word count. Which I think, in 2010/11 is meant to be around 500 -800 words.

With this done, I take a quick break. Usually to check on a photo upload, write an email and so on.

Second round of the blog post:

Next up I reread it. I will break up long sentences, and paragraphs. Clean up badly constructed sentences. And, spell check really obvious things.

I will now being inserting photographs that relate to the content, if it’s a journal based entry.

This involves coping and pasting two links. One for the photograph you see on the blog post page, and another for the larger image you get if you click it.

Then I need to write an image title for wordpress, so I can reference it. I then write an “ALT” text so that the search engines, and those with sight impairments know what the photograph is all about.

Following this, I write a description of the photograph for everyone to now a little more if need be. That’s the bit under the photo.

Finally, I place the image into the page, and make sure it’s positioning does not interfere with the main text content.

That’s a lot in itself.

I round things out with a good spell-check.

I consider this article or post, near ready. It’s saved for a day or two. Or until I get to good internet again.

Third round of my travel blog writing & revision workflow:

Now is when I come back with fresh eyes and reread everything again. Adjustments are made. Spelling, and grammar addressed. And, I may now change the title a little.

This is also where I add a meta description for search engines etc. Why I do this, is covered a little later.

The article or post is then scheduled for publication.

Publishing a travel blog workflow:

I write ahead of time. It’s not feasible to do so live.

Hopefully, and to be honest usually, I will have one more quick edit before publication.

As many of you know, I have dyslexia, and a lot of mistakes I simply don’t see. But leaving the post or article “stew” for a while helps.

MacBook
Just hitting publish does not mean I am through, there's still a lot to do

The post is then published.

It’s not over yet though …

Post published workflow:

I use a few tools to let everyone know there’s an update to my journal.

As the update goes live it triggers Twitter which is renown for bringing instant news to the world.

  1. People on twitter get a link to the post or article.
  2. At the same time Twitter then tells my facebook account about the link, and the link is published there too.
  3. While all this is going on, RSS feed readers are updated.
  4. Then an email goes out to all subscribers of my website with whole blog post or article included.

All of this stage I have set up to be automatic. But, I still check to be sure. Slip ups happen when dealing with technology. Or rather, multiple technology providers.

And, when they do slip up, it’s good to be ready and catch them.

When technology fails your travel blog

There are some really good people that follow my journey and belong to the growing community on The Longest Way Home who quickly let me know if something’s not right. Either by email, or twitter.

Thank you guys! You know who you are, so smile. I really do appreciate it!

I’d like to take this time to offer any new reader here the opportunity to join in and get my journal updates via email for free. You’ll also receive my stunning top places to travel photo e-book for free too.

It’s just away of saying thank you for leaving comments, and helping out. I really appreciate the people that stop by here.

Enter your email address & get a free subscription to The Longest Way Home Travel Blog:

All email subscribers also get a FREE copy of Top Places to Travel & Photograph e-book!

(worth $24.99 but yours for completely free)

Post post publication travel blog workflow:

If there are any mistakes, or corrections I try to get to them as soon as possible. Which isn’t always easy when traveling.

Sometimes there’s nothing I can do except try to forget I misspelled Filipina for the 100th time. Or, mixed up a paragraph. Once, online, I’ll correct any mistakes.

During this time I’ll also approve new comments. Which leads too …

Comment workflow:

I run a system whereby if you comment for the first time, it will be held until I approve it.

After it’s approved, any comment you make will now show up automatically.

This helps prevent spam. Of which I also have to filter through every time I log in.

I then reply to everyone who leaves a comment.

It might take a little time, but I believe if you took the time to comment on something from my post or article, then I should show due respect and reply individually to you.

I really don’t like blogs or sites that don’t take the time to comment back.

Email  feedback workflow:

With or without every article published, there’s usually several emails that are also waiting for me to answer too.

Many people feel it more personal to email a reply to an article than leave a comment. I feel it’s important to reply to these asap.

There are other emails waiting for me too though, and prioritizing is a must.

Some are long emails describing someone’s own hopes of breaking free and traveling, or moving to a new country.

Other emails are simple thank you’s, little hello’s and people reaching out to see who’s behind the website.

I welcome all these emails with much appreciation. Again, I can’t always reply immediately. Sometimes it takes over a week, or even weeks. But, I will always reply.

The secret to getting a fast email, is to – keep it short. With longer emails I feel it’s important to reply back at length as well. So, I mark them for “when I get time!”

The irony here is the longer, more carefully scripted and heartfelt emailers often have longer to wait for a reply than the short one’s.

Again, everyone gets a reply. But I still feel this is one area in my workflow I need to find a better solution too.

Coming up next in my Travel Blog Workflow:

Both before and after publication, there’s the whole world of promotion!

Because without promotion, who would ever have known about the website or article?


Categories
photograpy-articles Workflows

Travel Blog Workflow 6: Promotion

Just like a market in Budapest, you have to tell people what you have on offer, otherwise no one will ever know!

How to Promote your Travel Blog:

How did you find my travel blog, or website the first time?

Was it through a search engine when you were looking for something?

Was it through an email someone forwarded to you?

Or was it through a social media site like facebook or twitter?

Either way, somewhere along the line it wouldn’t have got there if there wasn’t some promotion out there.

My Travel Blog Promotion Workflow:

We already looked at a little of this in the previous work flow. But, here’s a recap.

  • I ensure my images are search engine friendly
  • Metadata is written out (many people don’t agree with this, but I use it in conjunction with excerpts)
  • Posts or articles are automatically listed out on social network sites like twitter, facebook and stumbleupon.
  • Subscribers are sent out an email with my latest article.
  • Replying to emails sent in by readers.

Why spend time promoting a blog post?

How many good content websites are there out there? I really don’t know. If I type travel blog into a search engine these days the chances are I’ll get back corporate, sponsored or paid for content.

It’s getting harder and harder to narrow down your search criteria without coming across someone else’s sales criteria. Be it for self promotion, or for sales.

The idea that “content is king” is in my estimation, a fallacy when it comes to today’s internet search.

There are so many people gaming the system of search engines for profit and promotion, that great content is lost.

In my estimation a great marketer, will rank a lot higher in search engines than a great writer.

A writer, unless they are tech savvy, have time, money and capability will lose out every time.

They want to write, they don’t want to spend countless hours looking for link exchanges, advertising, using Search Engine Optimization techniques, adding themselves to the latest top listed directories or buying themselves some votes.

A travel marketer or photography marketer is solely focused in ranking high in search engines. They may have some content, but, the priority will be to market it more than to write it.

There are incredible travel blogs, and photography websites out there that never see the light of day in the general circle of promotions due to this.

Hence, in this day and age – I do try to promote The Longest Way Home as much as I feasible can given my circumstances. Otherwise, it simply will never see the light of day.

It is however, not my number one priority. The journey is. As it had been from the start, the best promotion I have had is from the content I produce, and word of mouth.

Travel blog promotion workflow:

Once a blog post or article is released, the most common way I promote it is via twitter.

I use my phone a lot for this. I’ve tried tweeting out my latest post links on a frequent basis. If I am reading tweets, and replying to people. I usually tweet out my latest link before signing off.

Ideal restaurant social media flow
Social media plays a huge part in post publishing a travel blog article

From my own statistics I’ve found that once every 12 hours for a couple of days is good. The tweet needs to hit different time zones around the world.

After that, it’s an element of luck that the right person sees it, reads it, likes it and Retweets it to their followers etc.

I’ve also recently taken to asking an occasional question on Facebook regarding my journey and articles. I really don’t have the time for facebook, but do try for something different there.

Guest posts:

I’ve written articles on several other websites. Here I like to diversify my content and write about something I wouldn’t normally do, just like I am doing now. But I put an emphasis on high quality here, after all there will be a lot of new readers that will see you for the first time.

Attracting new subscribers:

I launched my first ebook 5 Top Places to Travel & Photograph earlier this year. It’s a free photo ebook to anyone who wants my free journals via email.

What people have found is that my statements are truthful and honest. They don’t get spammed. They get an update on average twice a week. They get additional content not seen elsewhere on the site. And, of course as promised they get a great photo ebook with lots of tips.

Link building:

I have a travel blog & photography directory. Anyone can ask for a link exchange. I do however ask you put you link up first, and then tell me about it via a comment on that page.

I get emails asking for link exchanges, but it really is better to just leave a comment on this page. It’s gets updated once per month.

Leaving comments on other sites:

Leaving comments on other websites is a great way to be noticed. I don’t do this for that.

I only comment regularly on a handful of blogs or websites. I do so because I like that particular article or the person who’s written it.

I simply don’t have time to do what I call “communal” commenting. Or “I’ll comment on your blog, if you comment on mine.”

This maybe a mistake on my behalf, but I simply don’t have the time nor inclination to leave a comment, for a comments sake.

However, if you do comment on my site, the chances are huge that I will go to your website and read it.

These days I tend to comment mainly on non travel blogs, simply to get away from “travel” 24/7. Or on helpful and constructive travel sites.

What happens next is up to you!  (hint: great content)

Ask for a comment or suggestion

One of the biggest mistakes I see people make, is ego. There’s nothing wrong with sending a tweet, email or comment asking for your opinion on an article you’ve written. Try it, ask someone for their opinion and chances are they will give it.

Email Promotion:

I wrote about this in the previous article about content writing and revisions. I feel it’s important to reply to anybody who takes the time to contact me.

I do this not because of what I just wrote. But, it has the side impact that the person who took the time in writing got a reply. Just like if I write to a stranger via a website and they reply back, I think well of them.

But there is only one of me, and I am traveling so there is a delay.

This is a personal website, and I feel it’s important to establish ties with people this way. Word spreads via email very quickly. This in turn, may provide a return in time and investment via work coming in. Increased readership.

And, so the word spreads.

What I don’t do is send out spam like emails to my subscribers. I know it’s a huge marketing bonus. But if you sign up to my updates, its finance free, spam free, marketing free, you even get a free photo ebook for free.

It doesn’t get much better than that.

What happens if you don’t promote?

An excellent example of a non-promoted travel blog is Karl Bushby’s. I can’t think of a traveler out there, today, who should be more promoted than Karl. But isn’t.

The reality of it is that Karl is working his butt off just to make ends meet. And, to complete his epic journey. To spend time and money promoting his blog everyday just isn’t feasible.

It’s a catch 22. Become a marketer with average content, and you will do very well these days.

Be an extraordinary writer, photographer or traveler and do nothing to promote your work in the realm of today’s internet. And, the chances are very few people will ever read or see your work.

I think of the above everyday.

The reality is, if you don’t want to be seen, don’t do anything. If you want to get noticed, do something. There are, however, limits.

What path you go down, is up to you.

Next will be the tacking of cost in running a travel blog

Categories
Featured Article photograpy-articles Workflows

Travel Blog Workflow 4: Photography – backing up

You might now come back to a place every again, so back up those photographs!!

This is the second part in dealing with Travel Photography workflow when traveling by Dave from The Longest Way Home Travel Blog.

Backing up those photographs:

With all the photographs named, sorted into folders and cataloged and uploaded. The next step takes priority over anything else. For me it’s the most important thing.

I begin the back up process. (I often do this when uploading)

Backup your photographs, I can’t say that enough

I plug in my second external drive which makes a duplicate copy of all these files using sync software. I then have a third hard drive which makes a final copy, this includes the raw images.

As I am always on the road, I do not have a permanent internet connection. And, this is the biggest, most expensive, issue with the workflow. Backing up to external drives is relatively fast. But backing up several gigabytes of data online is painstakingly slow. Average speeds of 200kb per second mean uploading easily takes days to do.

The benefit to using a photohost like zenfolio is that once uploaded, the photographs are also ready for use on my travel blog too. And, in various size formats.

One back up is never enough:

I don’t stop there though. I also use another backup service to back up my backups online. This takes yet more time, but I try to space it out as a second priority to the first backup.

Paranoid? Maybe. But let’s face it, a hard drive can break, be stolen, or get damaged easily. More so with travel. I don’t have a home base to keep the images. If I did, I would send Harddrives back for permanent storage.

I don’t see another choice in my own situation. I’ve tried burning DVD’s, but at 4-8 GB they mount up, and so do shipping costs. Moreover, optical storage has a low lifespan of about 5 years. Plus, to asks friends to constantly mind them is a burden. I switched to harddrive back ups, but similarly there are issues there.

This is why I feel that there are never enough backups that can be made.

Workflow continues during all this

During the backing up process. I will begin writing an article in draft format, answer emails, research my journey etc. So essentially there are many things going on at the same time to speed up efficiency. And, more often than not, make use of valuable internet time.

Final stages of the Travel blog photography workflow:

I usually choose which photograph I want for a travel blog post online. I select different sizes of a photograph to appear on a blog post or gallery that fits inline with any text. Again, Zenfolio allows me to select many sizes for a single image.

Titles, descriptions I’ve added in ACDSee or Lightroom will be imported automatically by Zenfolio. Including keywords, descriptions and titles to all photographs for my travel blog. As mentioned Zenfolio allows me to choose many different sizes to insert into a post. What’s more, due to this if a reader on my travel blog clicks on an image, they get a large version presented to them as well!

Additional photo processing workflows RAW vs Jpg:

Not all raw photographs remain untouched. I also use some for HDR processing, or if there is a serious correction problem that needs to be attended to. An example of corrections that can be made with raw files would be white balance.

5x 2TB WD HDD
Portable Hard drives can help you with backing up on the road

In the Philippines night food stalls and the streets are all lit up with dull yellow lighting in some places, and harsh florescent light in other places. Or worse, some hideous mix.

This can make a photograph very washed out or completely distort the colors. Processing the things like white balance with a raw image can help with this immensely.

Processing raw images takes quite some time though, especially when mixed in with everything else. Generally I only do this, if it’s a fixed photograph I want to work on.

Jpeg or RAW for a travel blog?

Firstly, as mentioned in the previous article. RAW files need to be processed first. They cannot be viewed directly online.

Many will say you can do a lot more with a RAW file than a jpeg image. And, they are correct. But, for me. The amount of time in the day or night simply does not exist to process all my RAW files into jpg and then upload them.

So, for nearly every image you see on The Longest Way Home. It’s a jpg taken directly from the camera with no processing. RAW’s are kept on separate backups, and used if an advertiser or client is looking for something specific. Other than that. They sit there.

Jpg’s are easier to use when on the road 24/7. Again, just be sure you back them up.

Links mentioned in this article:

Zenfolio photohosting (use this code ” BDV-TGN-A7X ” to get a $5 discount)

Lightroom

Review of online storage providers

Coming up next on my travel blog work flow: Writing & Revisions workflow

Categories
Featured Article photograpy-articles SEO for Photographers

SEO for Photographers: That dreaded thing call flash … or is it?

Flash on your website

Flash in layman’s terms is similar to video. I allows you to stitch together a series of photographs, images, text or just about anything into a nice package that can look fantastic on a website.

The downside to flash for photographers:

Ever come across a great photography site that looks fantastic. The images flow wonderfully. The how site is easy to navigate, it’s a great experience.

But why then is it not on the top of any search engine?

Simple, search engines don’t understand flash. It’s like showing a blind person a book, without Braille. They know what it is, but can’t work out the content.

Braille to the search engine comes in the form of text. And, flash has none.

SEO and flash, can they get along?

Not really. Search engine’s simply can’t see Flash, and, probably never will. Trying SEO on a site built on flash is a virtual waste of time.

Should you dump any notion of using flash?

This depends. If your website is entirely made from flash, and nothing else there are two things that will happen. The search engines will glance over it, and all you content will not be recognized. You will give the majority of your users an nice experience.

If all you are doing is putting up a portfolio to show clients, then go for it.

If you are trying to get as much exposure for yourself on the internet, then you will have to give a website created solely on flash another think.

The future of flash?

Html5 is a code that’s is being seen as the end of Flash. Or at least the end of the need for flash. The argument continues on. Html 5 is new, and while it is, and will be adopted by all, there is still life in flash for a long time to come.

Can you have the best of both worlds?

Yes, you can have a portfolio site that’s made from flash, and have a text version of the site as well. There are pro’s and con’s to this. Including more work, but it can deliver the best of both worlds and is worth a consideration.

Categories
photograpy-articles Workflows

Travel Blog Workflow 7: The Cost

The cost of running a travel blog is not often understood in its entirety

How much does it cost to run a travel blog?

Over the past 6 articles I hope I’ve brought an idea into both the workflow of how I write on The Longest Way Home.

I think the myth of quickly uploading a few photos and scrambling together some content has been dissolved.

Everything here takes time & money. Both of which, like anything in life, are finite. And, as such need to addressed.

The cost behind a single published article:

This is hard to give an exact quote on. For many reasons. Primarily because I do try to get many things done at once.

A trip to a market might result in two articles in a location with free wifi. Whereas a trip to a remote area, might mean one article and having to pay for expensive wifi when I get back.

Not to mention many photographs don’t get used, they get saved so that’s not factored in.

So let me tackle this as an average costing, here we go.

Photography costing workflow:

This is my far the biggest expense.

Taking an average photo session of lets say 2 GB of material after the first edit. It may take 6 hours to process everything including backups to external drives.

I like a quiet environment for this. So normally it occurs in a guesthouse room.

Uploading 2 GB to Zenfolio. For this I need internet. 2GB + average shared upload speed = 14 hours of uploading. (this does not take into account breaks in the connection, which are frequent.)

This also requires a constant electricity supply, and, leaving the laptop unattended for periods time.  So it has to occur in a private room.

Average cost of room (Asia) USD $10 – $15.

The processing happens at the end of the day, as does the uploading. So, it moves into a second day. Thus, equaling two days total. (it does not factor in additional online photo backups)

Total cost $20-30.

I need sleep, so I do most of this at night if possible. However an increasing number of guesthouses turn their wifi off at night. What’s more. Wifi signals often do not reach a room.

So, I am adding in another $12 for a third day if it means sitting in a common room.

Double up the work for content:

Now comes content writing. Here after a nights sleep, and if the wifi is still active I can produce 1-3 articles. Depending on what’s been happening, and content available.

Money-Euro-USD-LEI_53073-480x360
Few people think about the amount of time they spend online that amounts to the running cost of a travel blog

For the purposes of this work flow, I am including only food & water expenses for being stationary during these days.

Let’s throw in $20 there. And, not include internet costing or accommodation.

Promotion and emailing:

Let’s skip sitting in a guesthouse room for a while. And move onto on the road activity. And, it’s again internet related.

Mobile promotion of an article. Based on Philippines mobile internet costs it’s about $5 per week.

This includes quick email replies. Approving comments. Twitter and Facebook promoting.

Eating and working:

Many places offer free internet where you dine. I find this difficult unless it’s unlimited internet. And, it’s not too expensive.

I generally try to find a coffee place that doesn’t limit you on time. But this is an added expense. $2-3 a cup of java.

Moreover in both places there’s not often an electrical socket.

I use both of the above for comment replies, emailing, and content edits. Rarely, for photo uploading.

I do take advantage of free wifi too. But, again, generally speaking you need to buy something at a place.

Total cost x 2-3 times a week $15

Adding up the costing workflow:

If you add up all the above it comes to $75 per week.

This is not an accurate figure though. It’s not taking into account the fact that I am traveling, and might be in a wifi enabled guesthouse anyway.

I am also not including costs on backup’s of backup’s I mentioned in the Photography workflow.

Another thing not taken into account here is a social life. Maybe I meet some people, and head out for the evening. Is this a lost night of uploading?

So with the greatest respect of making an approximation on this number I’m shooting at $60 per week.

This is based on one photo shoot and two articles along with promotional and content workflows.

That’s one big expense.

Breaking down the costing workflow total:

There are however some other factors not being considered here.

Photographs from one day’s shooting can be used in several future articles and not just 2.

Is it fair to label backups, hosting etc  as a travel blog expense? I think it is.

Either way, it’s easy to see that the biggest cost factor in running this travel blog is the photography side of things.

I generally only post between 3 and 4 photos per article of post.

However, in a photo shoot there can be as many as 80-100 photographs.

Do they all get used on the website? No. Do they all need to be backed up and uploaded? Yes.

Alas it’s a catch 22 again based on my predicament of having no base.

Open to suggestions of how you do it, and alternatives?

In the next part of travel blog workflow costings I’ll cover my revenue business workflow? Aka how to recoup some of these expenses, and some rationale behind it all.

[author] [author_image timthumb=’on’]https://www.fotoark.com/wp-content/uploads/2010/12/The-Longest-Way-Home-Logo-small-rounded.jpg[/author_image] [author_info]


[/author_info] [/author]


Categories
Interviews photograpy-articles

Interview: Corporate Photographer Jurgen Banda-Hansmann

Corporate photography stadium
Corporate photography by Jurgen Banda-Hansmann

South Africa is knows as a beautiful tourist destination, but beyond landscapes and wildlife is a thriving land of business opportunities. South African photographer Jurgen Banda-Hansmann has taken up the mantle and is providing some of South Africa’s corporations with stunning images.

What’s more is that Jurgen’s photography business Jurgen’s Photography is expanding and taking him around the world. Let’s find out more from the photographer himself

Jurgen Banda-Hansmann

FotoArk: How long have you been a photographer, and what got you started?

I started my business  about 3.5 years ago. I was working in the call center industry as resource planner and analyst. My then my boss resigned. After a long thought process, I decided not to apply for her position. As I achieved everything in the company I could

have, I decided to resign and start my business. Working as photographer was always my dream. It was the right time to do the jump.

FotoArk: You specialize in 3 genre’s, corporate, editorial, and travel. Can you explain the key differences you as a photographer experience in each one?

All photographic genres tell stories. It is what you focus, which makes the difference. Corporate photography tells the story of individual companies. Corporate assignments can vary from on location portrait sessions to photographing all aspects of a company, including headshots, production process, architecture, staff members at work, etc. I love those opportunities of telling stories, especially when my clients have a clear idea of what they expect from the shoot.

Travel and editorial photography are newer additions to my work. Travel photography allows me to tell the story of a location as I experience it, very personally. Often these are assignments, either from overseas or locally that a focus on Cape Town or South Africa. Interesting in between assignments are the photography of incentive events from overseas corporates.
Editorial photography assignments cover stories about specific themes and can range from portraits to photographing landscapes, cityscapes, interviews etc.

FotoArk: What’s the most challenging aspect of corporate photography today, and how have you overcome it?

Finding new clients was a major challenge. I joined a business networking organization (BNI). Since I joined, I learned a lot about networking and presenting myself. A good portion of my work is a direct or indirect result of networking offline and online. Twitter has been one of the most versatile online tools for new contacts and assignments.

Cape Town Panorama
Cape Town Panorama

FotoArk: Tell us what’s been the most rewarding thing to happen to you through your work?

Most rewarding is the experience of meeting people and learning about them. Earlier this year, I shot a story for a German magazine about people living with disability in Cape Town. The people, I met had incredible stories to tell.
FotoArk: You are currently based in South Africa, does the economy play a huge factor in corporate photography there?
Economy and corporate photography go hand in hand. When the economy growth is slow, I can see that in the number of assignments or size of assignments I receive.

FotoArk: What are the two most important pieces of camera equipment you use in corporate photography, and why?

I don’t want to sound smart, but it is my brain. Even with the best planning, you find yourself sometimes in situations, where you have to think on our feet. Flashlights and my tripod are the most important tools beside camera and lens.

FotoArk: How do you gain new clients in this competitive business? Do proactively advertise, or do you literally knock on doors?

I find a good portion of my clients via business networking (on and offline). Business networking is about creating relationships with other individuals and companies. The focus is on helping each other and not hard selling.

My website in connection with my blog, Twitter and Google ads also brings in some good leads. I spend a good amount of energy on

Corporate team photography

SEO (search engine optimization) for my website. Proactive inbound marketing describes best on how I find clients.

FotoArk: What advice would you give to someone just starting out who has a passion for corporate photography? Equipment, how to go about it etc.

First of all, you have to be passionate about it and have the patience and resources to go through the tough times. You need to know your photographic techniques inside out. You need to know your lighting and composition. Good camera gear is essential and I believe in keeping things simple. I work mostly with three lenses: 17-55/2.8, 70-200/2.8, 50/1.4
FotoArk: Is there a stigma that a corporate photographer needs a high-end DSLR and equipment to get work? Either way, what’s your take on this?

Good gear is important as a tool, but you don’t need the latest and best camera to get work. Your results count. The gear must be professional and reliable. I work with APS sized sensor DSLRs from Nikon (D90, D200). Bigger sensor cameras are in most cases not required in my field. If I need a full size sensor camera, I rent it.
If there is an equipment I really want to work with for most of my assignments, it is a Leica M9 with corresponding lenses. The camera and lens quality are outstanding and small. The less I have to carry, the better. At this stage, I don’t have enough of international travel assignments to justify the cost of that camera.
FotoArk: What would you answer if a client asked you this: “What makes you different from any other photographer?” (eg, why should we hire you)
Whatever and whoever I photograph, my aim is to reflect the soul of the person or place. What makes this person or place special? What is unique? I aim to dig deeper than just showing the surface. I believe when I understand the core beliefs of a person, a company I can create images that stand out.

Interested in hiring Jurgen for corporate photography? Here’s some more information:

[author] [author_image timthumb=’on’]https://www.fotoark.com/wp-content/uploads/2010/11/Jurgen-Banda-Hansmann.jpg[/author_image] [author_info]

  • Do you currently sell your photographs: No
  • Do you currently offer stock photography: Yes, via my Photoshelter archivesWould you be willing to sell your photographs to an agency? Yes/No – Yes
  • Would you accept a contract offer for photoshoot: Yes
  • Where are you available to photograph? I live in South Africa, but location is secondary. I photographed an assignment earlier this year in Vancouver, Canada for example. “Have camera can travel”
  • Contact details: You can contact me via my website – www.jurgensphotography.com or call my office during working hours (GMT +2) at +27-21-6805211 or contact me via Skype: jurgenphoto Twitter: jurgenphoto

[/author_info] [/author]

Categories
Featured Article photograpy-articles Workflows

Travel Blog Workflow 1: Why?

What’s a travel blog workflow?

workflow
The Longest Way Home Travel Blog, how it’s all put together may help you too!

A workflow is the process from beginning to end of a subject. In this case, how I write an article for my travel blog on The Longest Way Home

Why write about my travel blog workflow?

Several reasons –

– I don’t think many people realize just how much work, time and money goes into producing a single blog post.
– It’s something I would really like to read about myself, and learn from.
– My workflow may be very different to others, it may help their own process.

Twitter mail via tarpipe
Having a workflow can help you work a lot better

– Comments left by people may offer suggestions on how I can improve my work flow.
– In some circles there’s a veil of near secrecy on this subject, some people even try to make cash out it.
– It’s always nice to see how someone else does something you like.
– It will give you an indication on how I work, and maybe think.
– It will serve as a reminder to me, that in 2010 this is how I was doing things. It’s certainly very different from 2008 e.t.c.
– It’s all part of my learning, and documenting my progress on this journey.

My workflow can help you in putting together your own!

The vastness of a travel blog workflow:

I’m going to break this down into several articles. But the one thing I’d like you and I, to consider is that by the very nature of travel, things change on a whim.

Maybe it’s a rainy day, maybe I don’t have internet, and maybe I need to get something written quickly, or maybe …

And, so it goes on.

But for the main part, I will be documenting and covering an average and not so average travel blog post from beginning to end.

This is all sounding very professional?

Yes, it is.

2 years ago I was writing and photographing on a sub domain. No one knew about it. As in, zero. It was my personal account and record about this journey.

Then a few came across it by accident. Word spread.

Now, several thousand people read about my journey and life every week.  And, many more join everyday.

That’s not something I planned. But it is something I’ve had to address.

From hosting issues, to improving my own learning curve in web development and off site publishing. From working on improving my photography and writing skills. To moving ever closer in completing this quest; it’s all been amalgamating and amassing into what we have today.

And, it continues to develop.

New sets of skill have been learned, lessons have been learned and new goals set. The journey is ongoing no matter what people may conclude. It deals with aspects of moving and searching for a life and home that’s not been done anywhere else.

What I write is happening to me. How I go about it, I now wish to share.

Why write about it here?

The Longest Way Home is about my journey, and while some things may overlap. The workflow was meant to be only a single article, but then it moved to 3 then 5 and so on. I don’t think the majority of the readers on The Longest Way Home want to know this.

It will get a mention at some stage, but, for now it is here on FotoArk, a travel & photography magazine. Which makes more sense for this subject mattter!

The series is currently running at 8-9 articles.

Travel Blog Workflow 1: Why?

Travel Blog Workflow 2: Concepts

Travel Blog Workflow 3: Photography

Travel Blog Workflow 4: Photography 2

Travel Blog Workflow 5: Writing & Revisions

Travel Blog Workflow 6: Promotion

Travel Blog Workflow 7: Advertisers, comments, and emails.

Travel Blog Workflow 8: The Cost

Travel Blog Workflow 9: Income Generation


This is by no means an exact episode list! I might double up a few, or add something. But everything here will be mentioned at some stage.

But that’s what’s coming up right here, right now on FotoArk!

Want to get all of these workflows for free? No problem you can either have them delivered to your via email here. Or, just follow FotoArk on Twitter (I suggest you set up a list with just  fotoark on it)

Categories
Featured Article photograpy-articles Workflows

Travel Blog Workflow 2: Concepts


Mural inside Sofia in Turkey


Where does the idea for a travel post or article come from?

So where does a travel blog post idea come from? Well, in my case it’s very easy.

First and foremost, I write about my journey. Which can be broken down into things like:

People

Places

Feelings

Incidents

and, is this a good place to live?

I also write about particular places I’ve been or currently am in, from a visitor or tourist’s perspective. But, relate it to my own journey.

There’s more too it than that:

I also like to focus on certain aspects of a country in relation to my journey. Maybe how I relate to the society, or the food, or how what it’s like to work there.

Hence, articles like my Food from The Philippines, or Seeing the Unseen started. Or, how individual ones like dealing with religion are written.

Moreover, I might also want to cover an angle no one has yet touched on in a country before.

Last but not least, there’s the photography aspect of things. Maybe there’s a place, event or situation I’d like to photograph. Here, the camera takes the lead and the writing follows.

So, for me, these are a the things that bring about the concepts of my travel blog posts.

Which one I choose, determines my workflow.

Multiple concepts, 2 workflows, one travel blog:

Design Assignments 2010 Higher Grade Product Design * Rasheeda
Concepts need to happen to form the bigger picture!

For the purposes of this series I will touch on photography taking the lead, and articles about finding home.

Each one melds together at some point, but each one seems to have a different work flow. At least, for now.

Travel journal workflow:

Here I write about my journey to find home. In each place I go whether it be a country, city or area I write down my experiences and thoughts.

Both get written into two forms:

  • Online travel blog
  • Offline hand written journal

Online I will usually write about a situation, and relate it to my physical whereabouts. In other words, if I am visiting a place.

Rough and ready, a first draft can contain excerpts from my off line journal as well. It’s then expanded upon, and photographs added.

Offline, I write more about the personal events, personal feelings, rants, raves and everything else not suitable for general viewing. All this, has, culminated in many, many, journals. A batch of which have been edited into a manuscript.

Photography workflow:

This is when I am out and about. The camera rarely leaves me. I use it to document my journey, and the places I’ve been. But then, as in life, I’ll spot something special.

Maybe it’s a man on the road begging, or someone painting something. Here, the camera leads. And, I will document the event.

This is where I enjoy photography so very much. For it gives me an insight into the real country I am traveling in.

From there comes the workflow of the photograph telling the story, with the words following.

How easy is it to think of concept or photograph to write about?

From a conceptual, and creative stand point this is the most enjoyable. It’s creativity, story telling, and documenting at it’s most raw.

But like anything in it’s most basic of states, it needs refining to be presentable. And, now the really hard work begins.

Concept travel blog workflow summary:

There are two main areas here that lead to a post:

1. Written idea – life, the journey, the situation, the journal etc  – get put into hand form, and first draft online.

2. Photograph – an event, a photograph that tells a story, real life situation I find myself in, places I’ve been – first draft written around this

Coming up next: Part 3: my travel photography workflow – I’ve taken the photograph, but now I’ve got to manage it, process it, back it up, and publish it. All from the road, not an easy task.